Why you need to track experiments
As data scientists or Machine Learning engineers one of the most overlook things is “model lineage”, that is, being able to track the data and hyper parameters used to produce a model. This helps ensure reproducibility, which is really important for a number of reasons.
mlflow isn’t the only tool that helps us track experiments, but is the one I like the most, other tools for experiment tracking are: comet.ml, tensorboard, dvc. All of the previous list, minus DVC, have a GUI to explore results, DVC is more like a git complement and is my favorite from the list.
Prerequisites
For this build you’ll need:
- A raspberry pi with Raspberry Pi OS installed
- Docker installed in your raspberry pi. It’s really easy to set up, follow the official Docker install guide for debian
- Python3 installed in your raspberry pi
- *python virtual env to isolate the requirements for the server
- *an aws account
* optional requirements
What we’ll be setting up
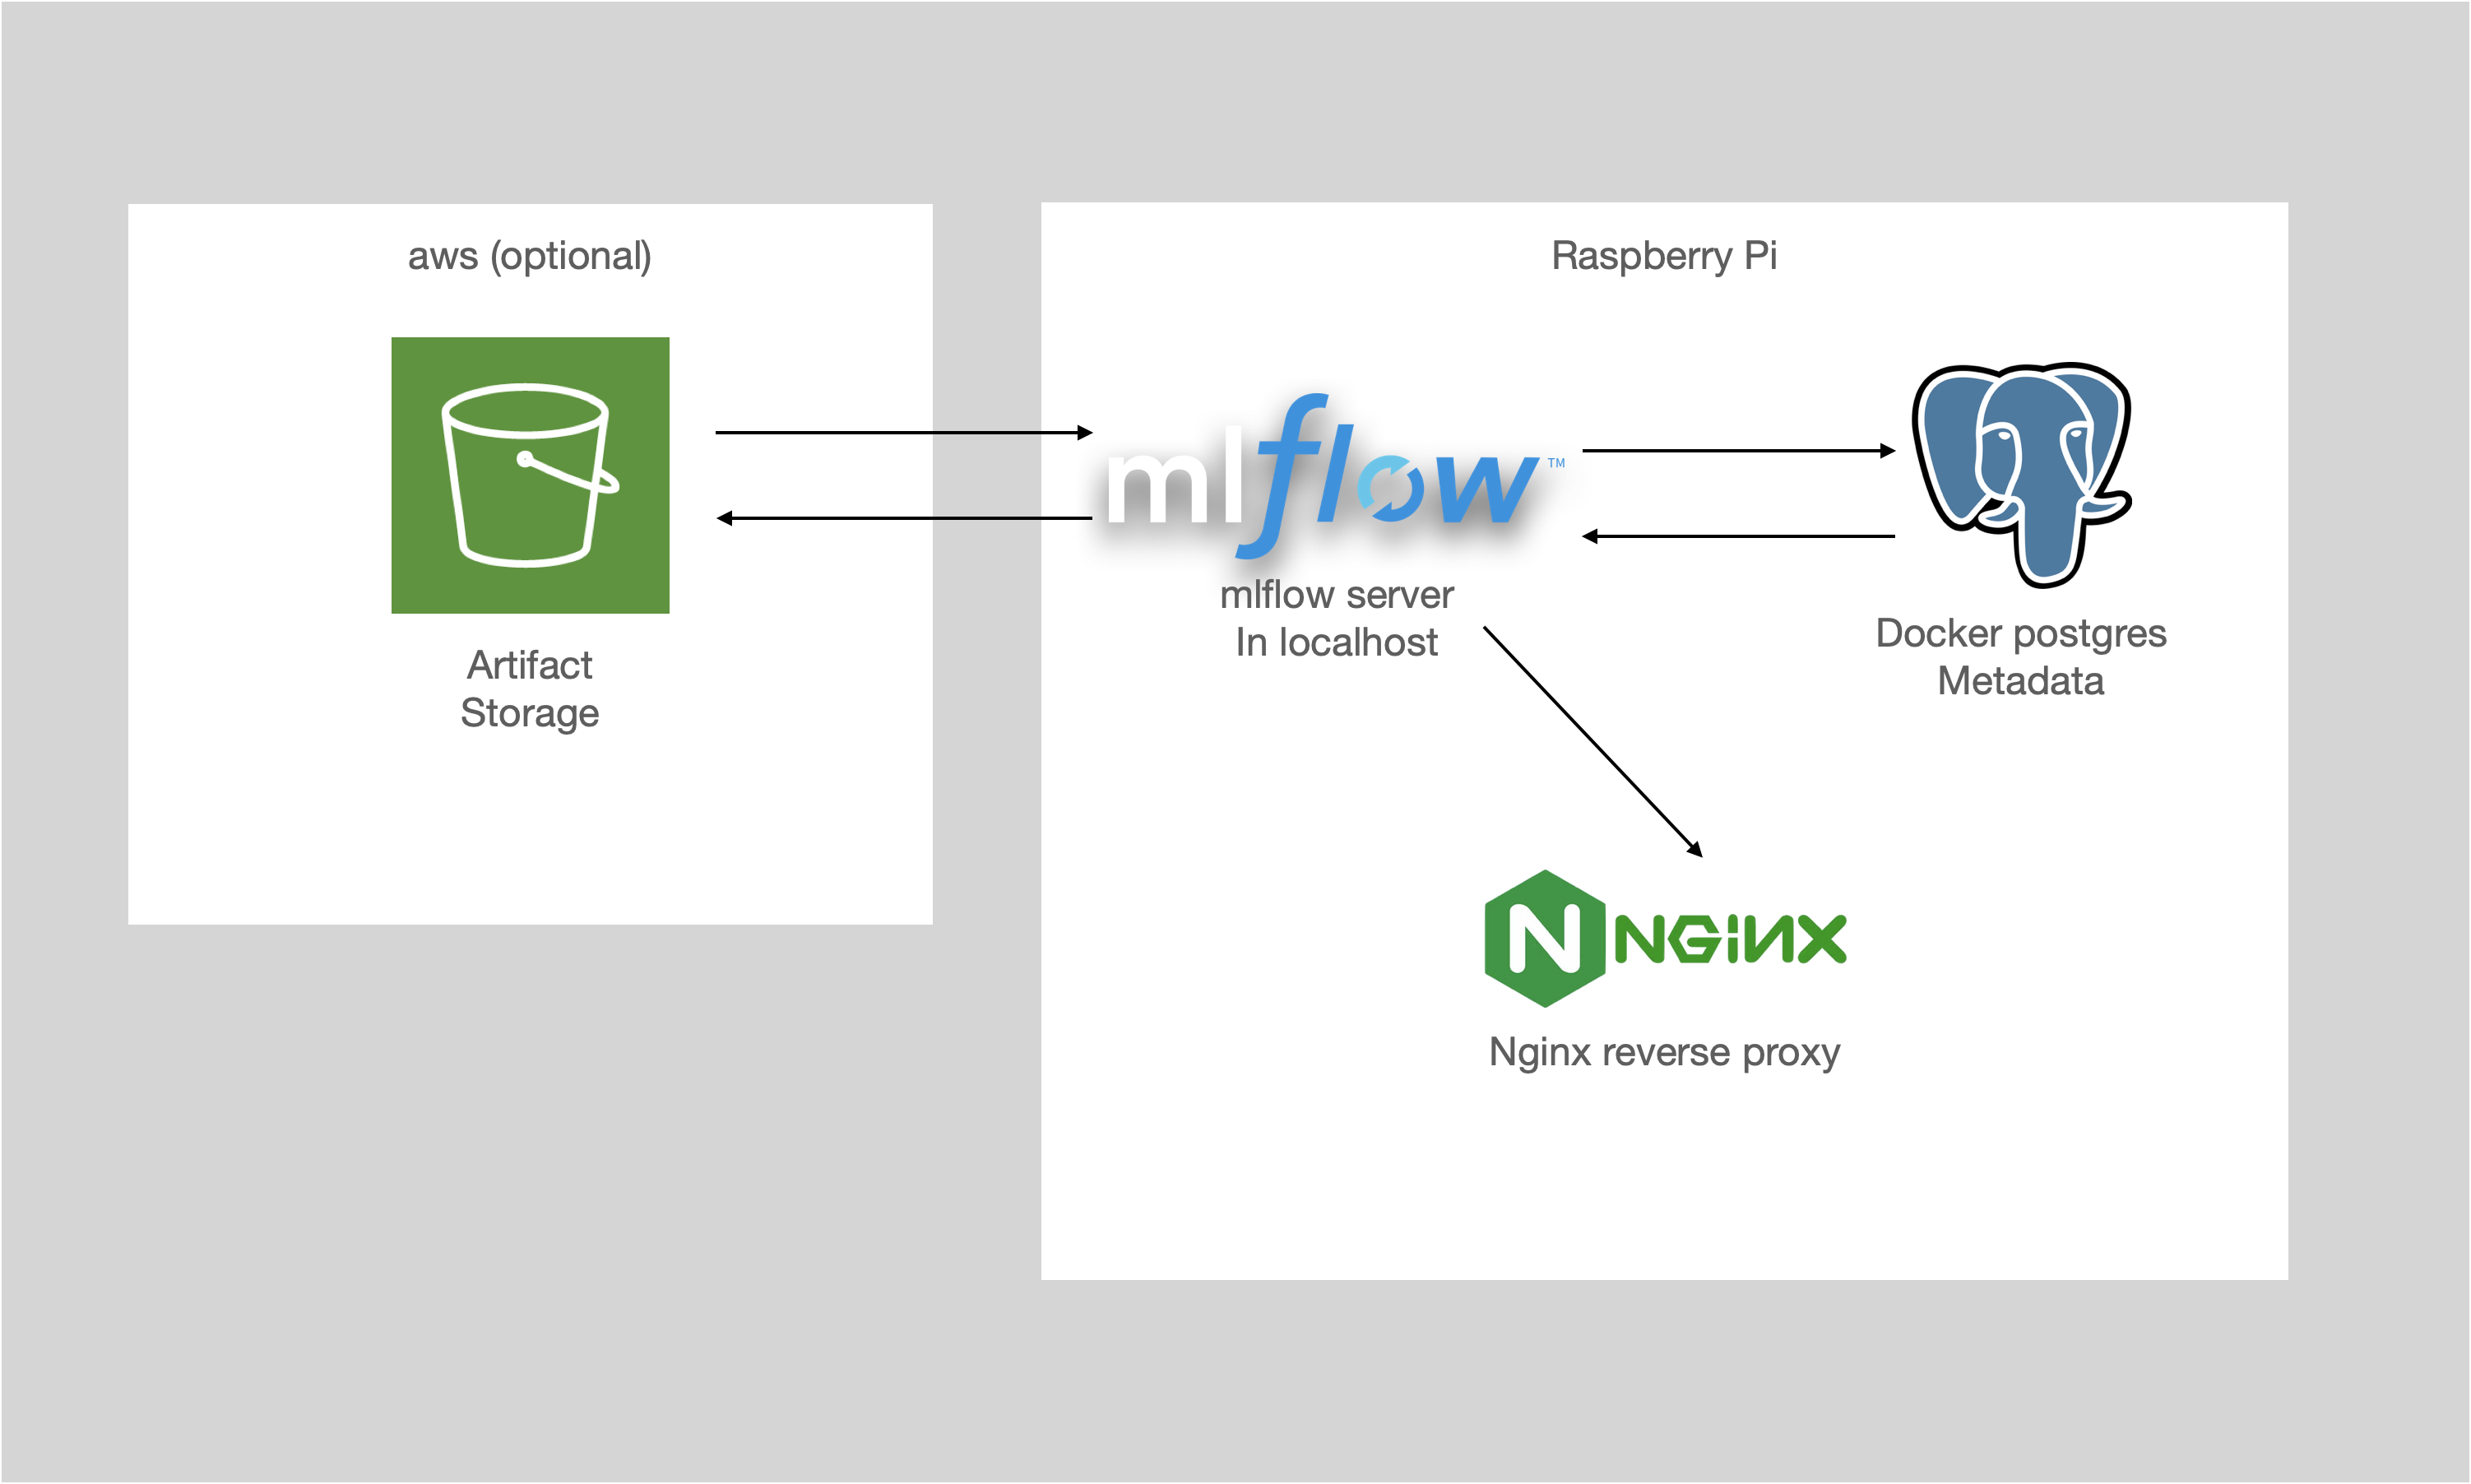
There are three main parts to an mlflow server:
- The server UI: This is the flask web application that lets you interact with the experiments that have been run.
- Backend storage: Place where the experiments, runs, metrics and parameters are stored. It can be local file storage, but in order to use the mlflow model registry we need to use a relational database, in our case that’s postgres.
- Artifact storage: We need a place for artifacts, such as the serialized model, or a plot that you want to save. This can also be locally stored, but we’ll see an optional aws s3 storage solution.
In the end this is what we’ll be building.
Setting up backend storage
Docker is a great tool because it lets us deploy a number of tools fast and easy, plus it has a lot of official images, one of which is postgres. To run a postgres docker container there are a couple of things that we need to define, the basic syntax is:
docker run -d --name container-name \
  -e POSTGRES_PASSWORD=mysecretpassword \
  postgres
The only required environment variable is POSTGRES_PASSWORD, the default user name is “postgres” and the default database name is whatever the user is, you can learn more about the docker image in the official documentation. This is good enough to get you started, but we suggest you declare at least a couple more arguments:
docker run -d -p 5432:5432 \
  --name mlflow-backend \
  --restart unless-stopped \
  -e POSTGRES_USER=mlflow \
  -e POSTGRES_PASSWORD=supersecretpassword \
  -e POSTGRES_DB=mlflow \
  postgres:14
Let’s break the command down:
-druns the container in detached mode-pspecifies port mappings, it’s always a good practice to specify this in case you want to specify a different port--namegives our docker image a name to find it when using thedocker pscommand--restart unless-stoppedmakes sure that our container is always up, even when rebooting the piPOSTGRES_USER,POSTGRES_PASSWORDandPOSTGRES_DBare all postgres related variables. Make sure to choose a good password.postgres:14the name of the image to use, it’s always a good practice to specify the tag you want to use, in case the latest version of the image has breaking changes.
(Optional) Set up s3 artifact storage
This is an optional step to use s3 as our artifact storage, we’ll be setting up 3 things:
- S3 bucket
- aws user with access to the bucket
- aws cli credentials in the raspberry pi
Creating s3 bucket
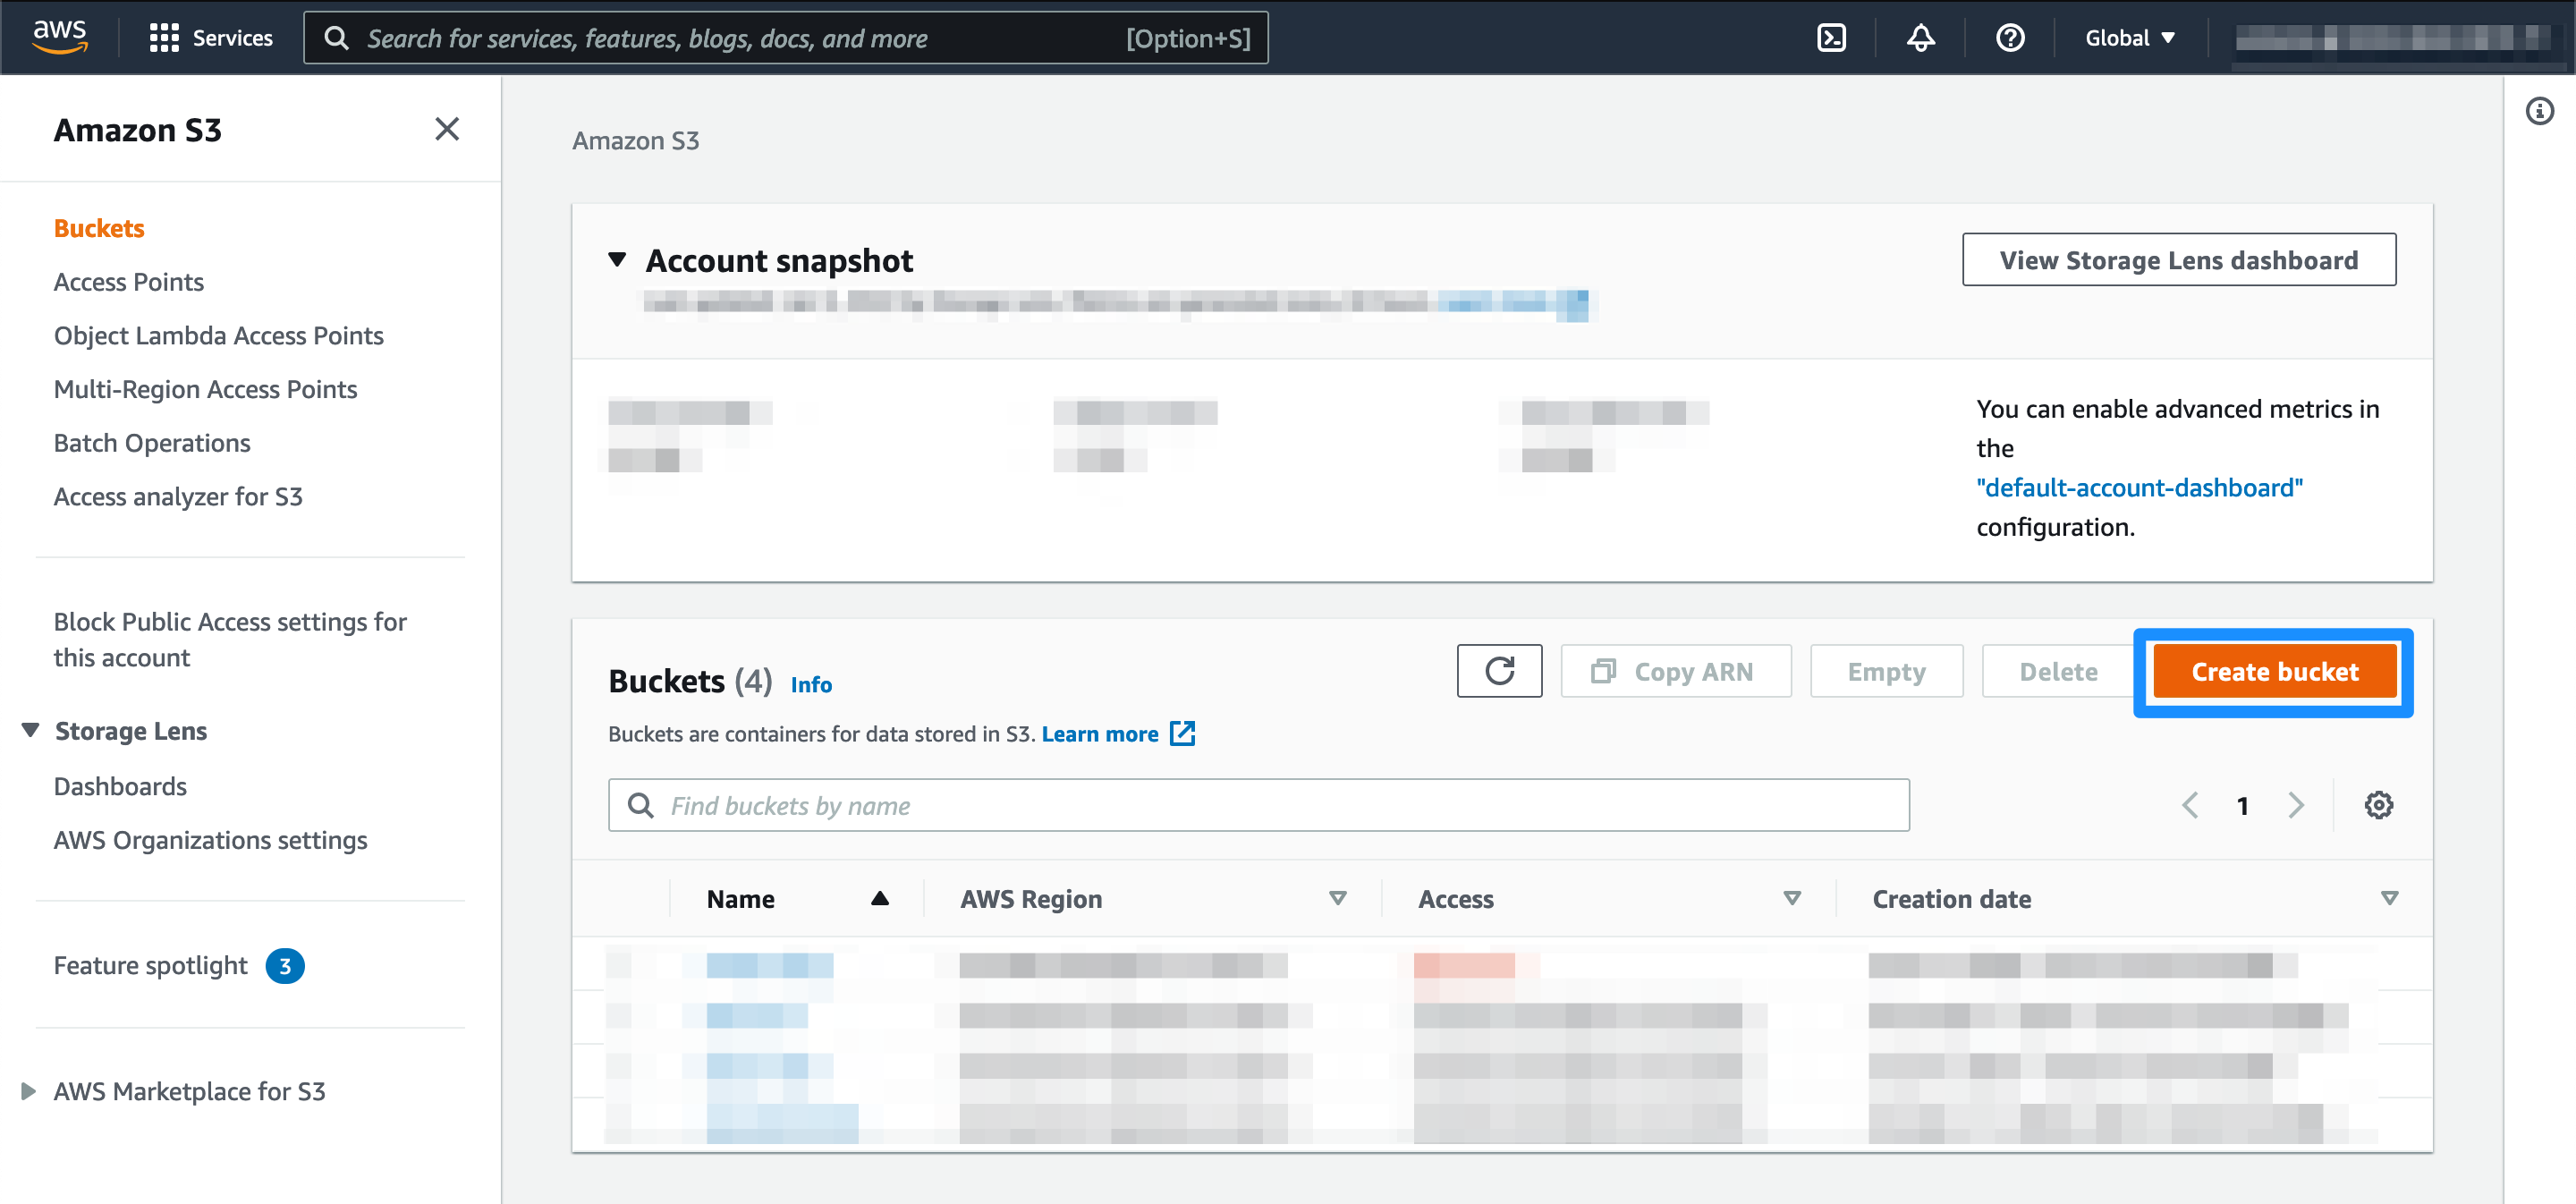
In your aws console go to the s3 console, you can use the search bar or in the “All services” part of the console. Once in the s3 console click on the “Create bucket” button.
Choose a name and region for your bucket. For the bucket name choose a descriptive name, bucket names need to be unique across aws regions, so you might need to give it a couple of tries. For the region, choose the closest one to you. Leave everything else with the default settings and click on “Create bucket” at the bottom of the page.

Note: You don’t need a new bucket for this, in my case I have a bucket that I use for miscellaneous things and just use a different root for each use case.
Create an aws user to access the bucket
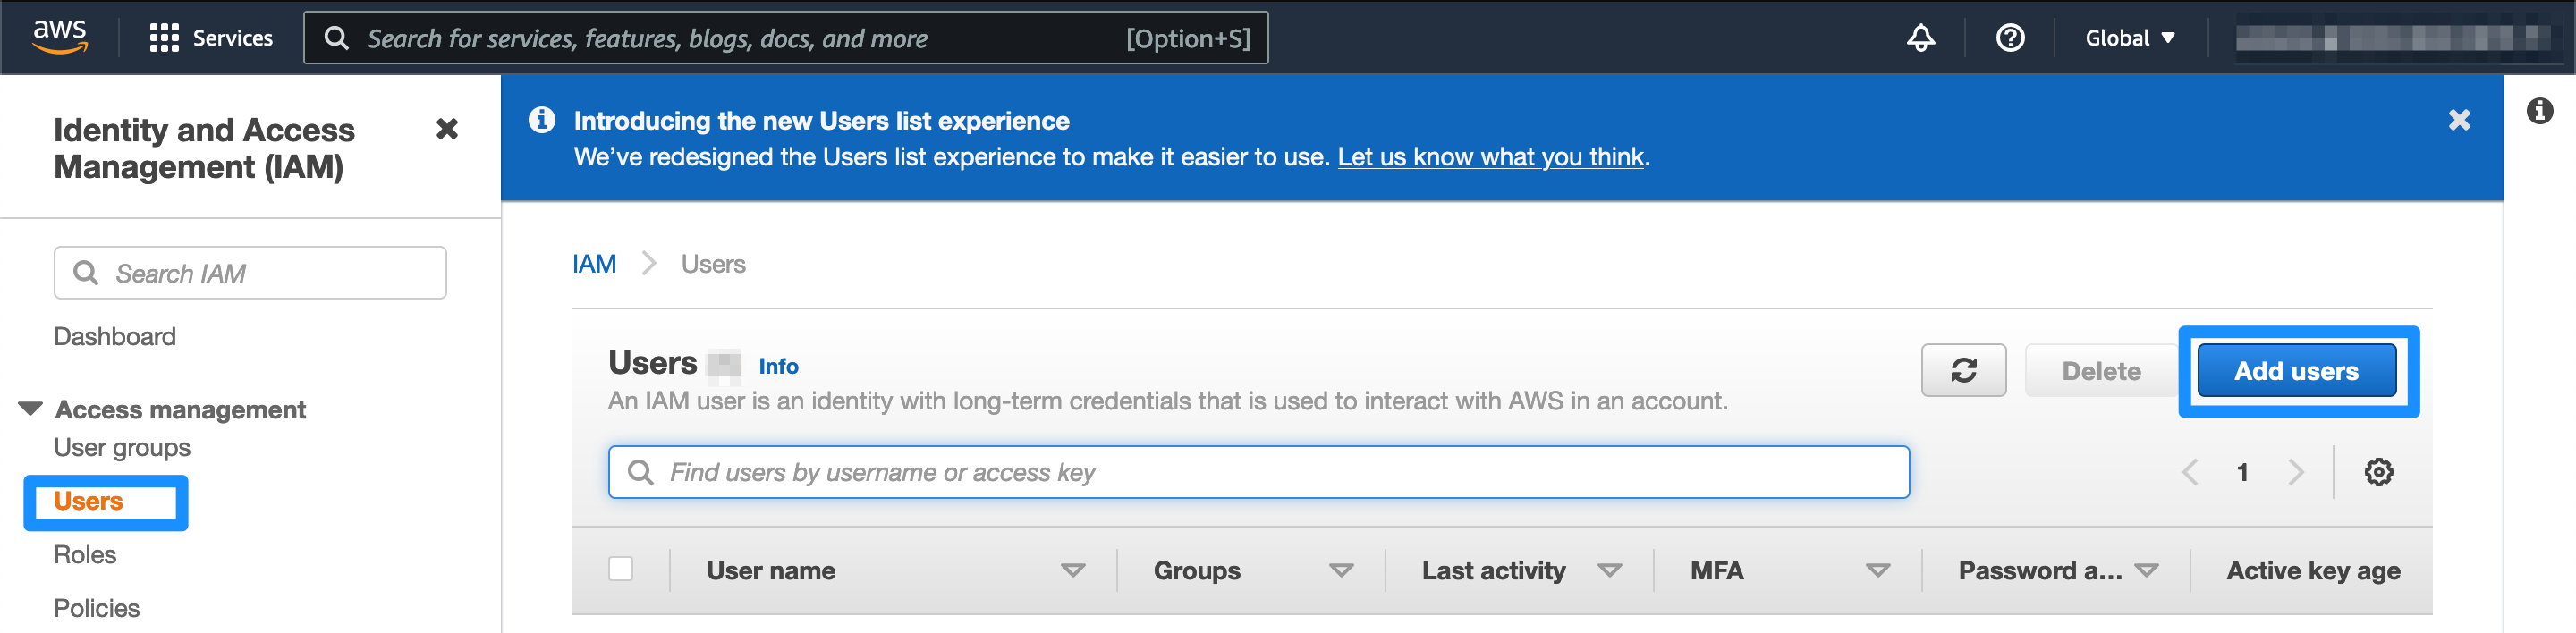
Navigate to the IAM console, in the side menu there’s an “Users” menu item. Once there click on the “Add users” button.
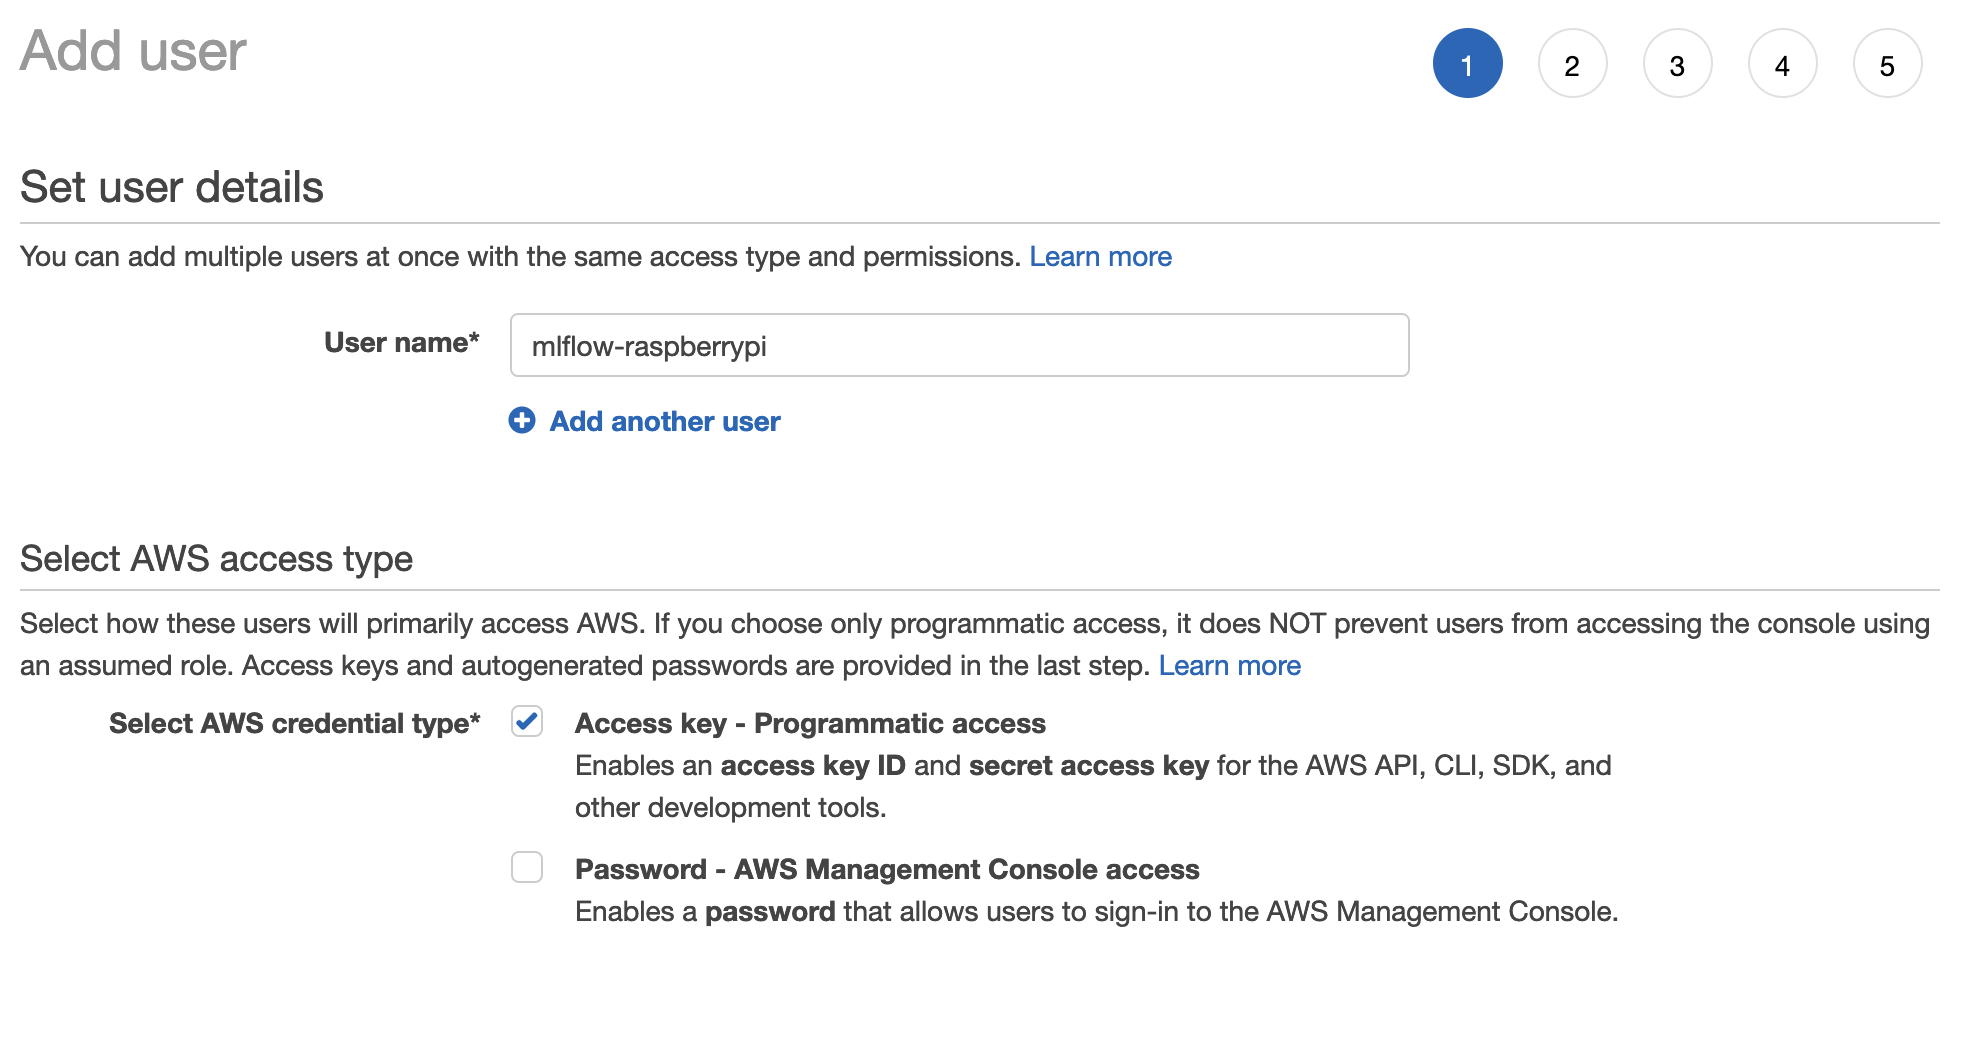
Give your user a memorable name and only enable programmatic access. Click on the “Next: Permissions” button.
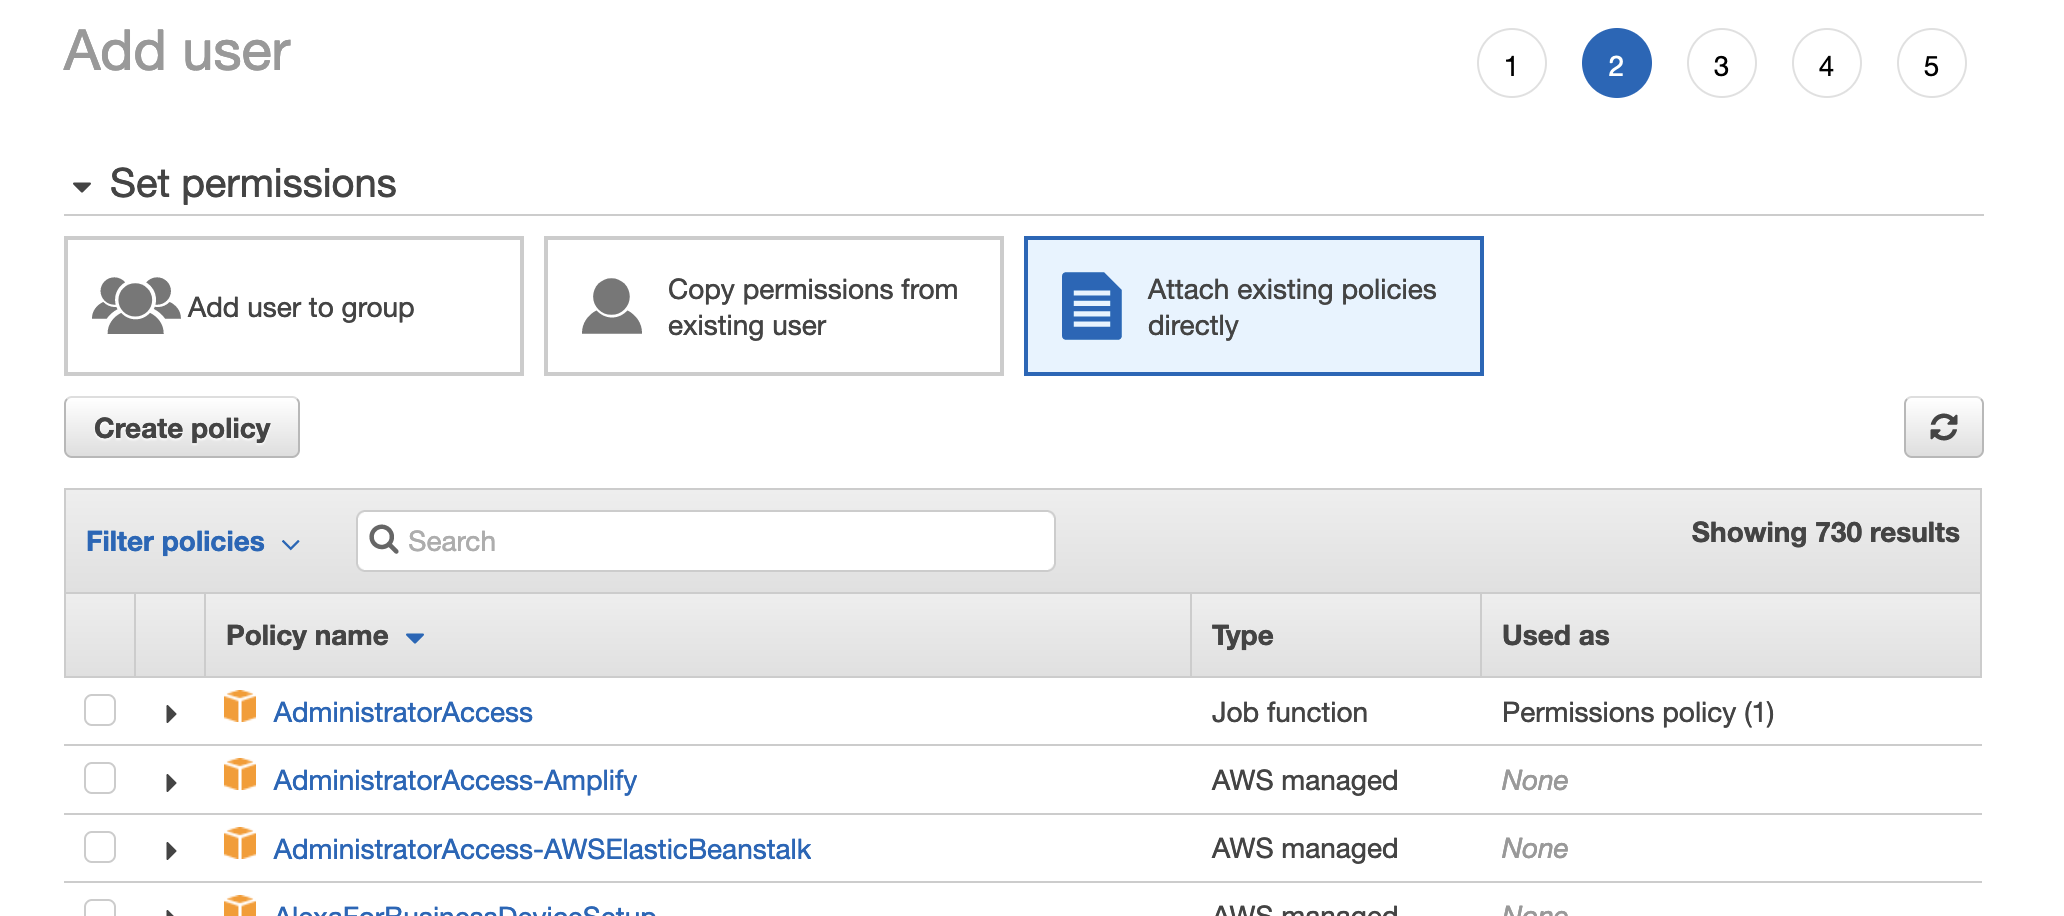
Next we’ll setup the user permissions, in the second step clik on “Attach existing policies directly” to choose a policy to attach, there is no policy yet, so we’ll need to create a new one. To create it click on the “Create policy” button, this opens a new tab.
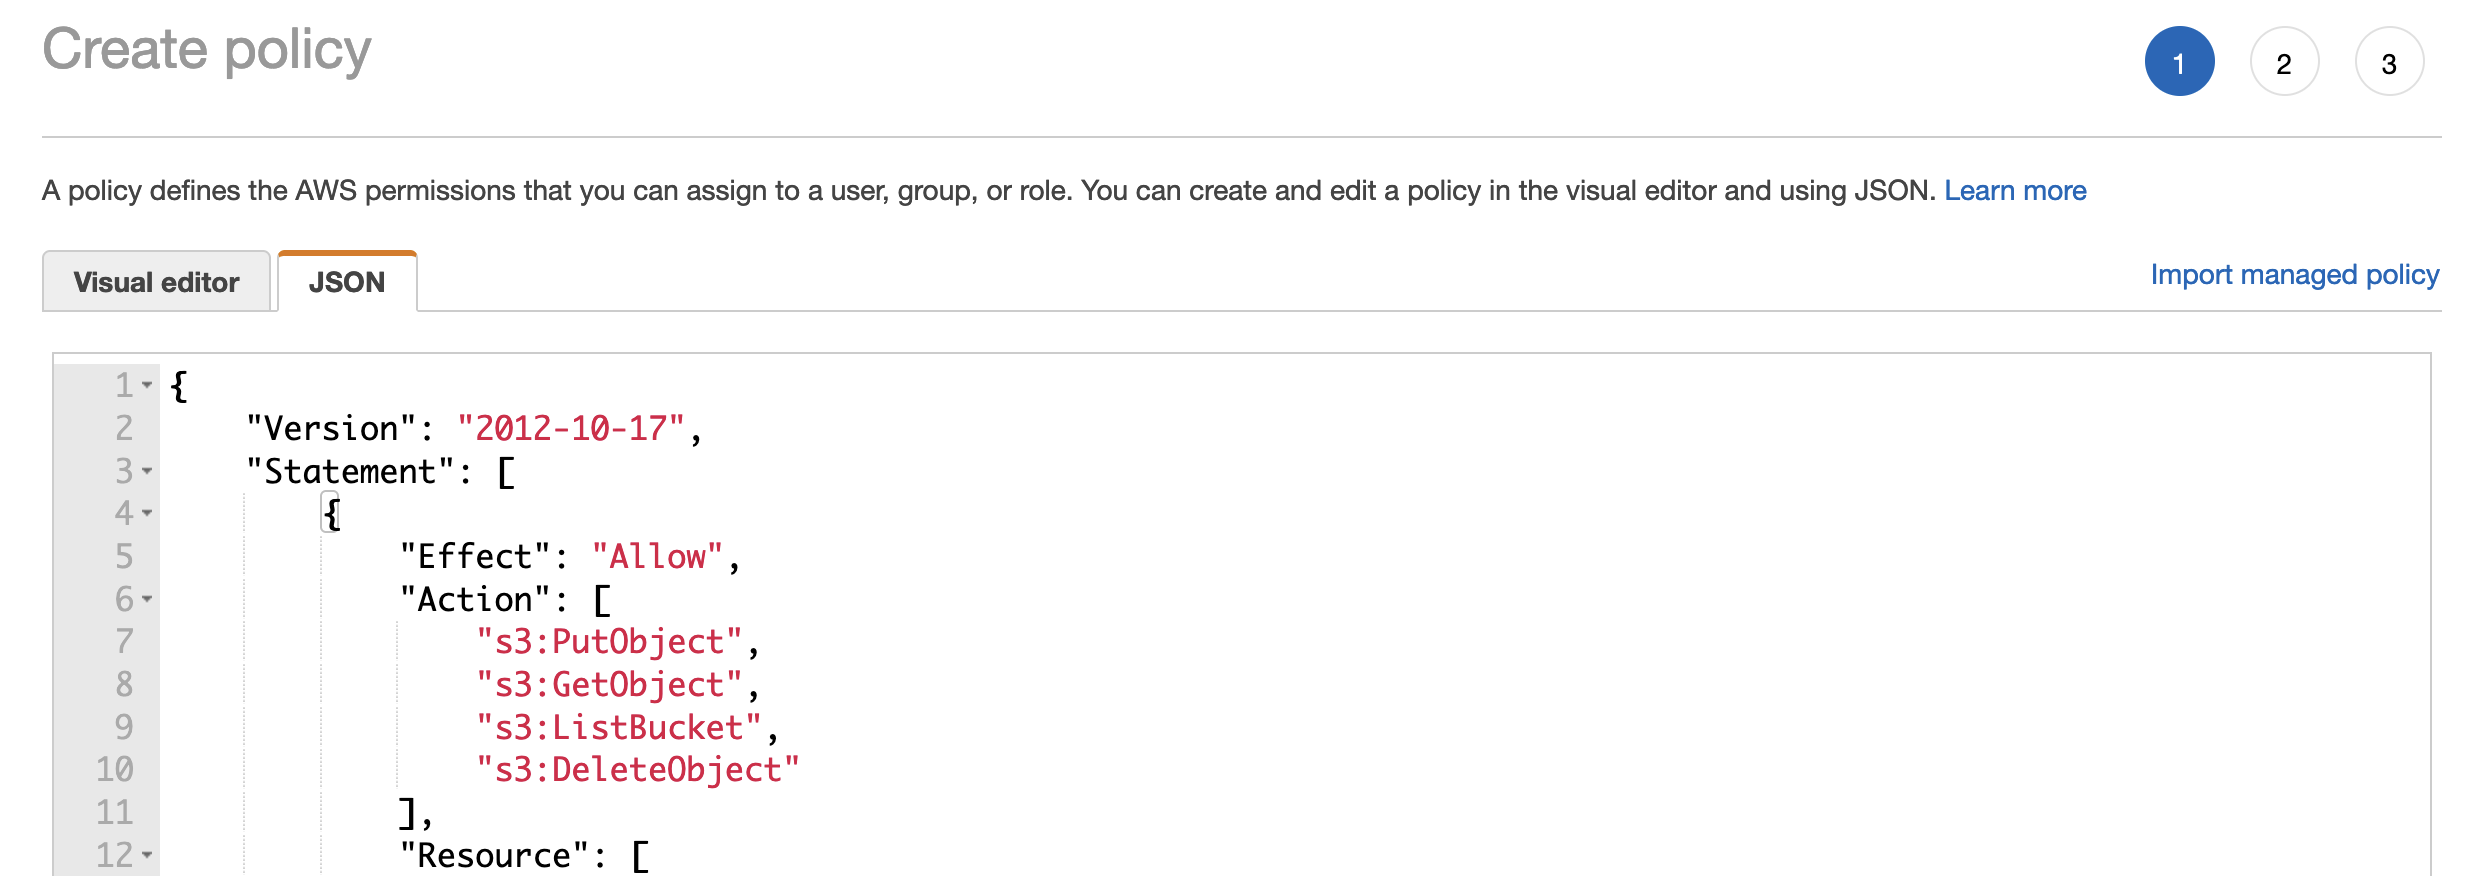
In the new tab that was opened click on the “JSON” tab to define the new policy using JSON. Paste the following text and don’t forget to change the bucket name for your bucket name:
{
    "Version": "2012-10-17",
    "Statement": [
        {
            "Effect": "Allow",
            "Action": [
                "s3:PutObject",
                "s3:GetObject",
                "s3:ListBucket",
                "s3:DeleteObject"
            ],
            "Resource": [
                "arn:aws:s3:::YOUR_BUCKET_NAME/*",
                "arn:aws:s3:::YOUR_BUCKET_NAME"
            ]
        }
    ]
}
This policy ensures that the user only has access to the bucket of your choosing.
Click on “Next: Tags” and optionally add tags to identify the policy. After That click on “Next: Review” to finish configuring the policy. Choose a name and optionally add a description to your new policy.
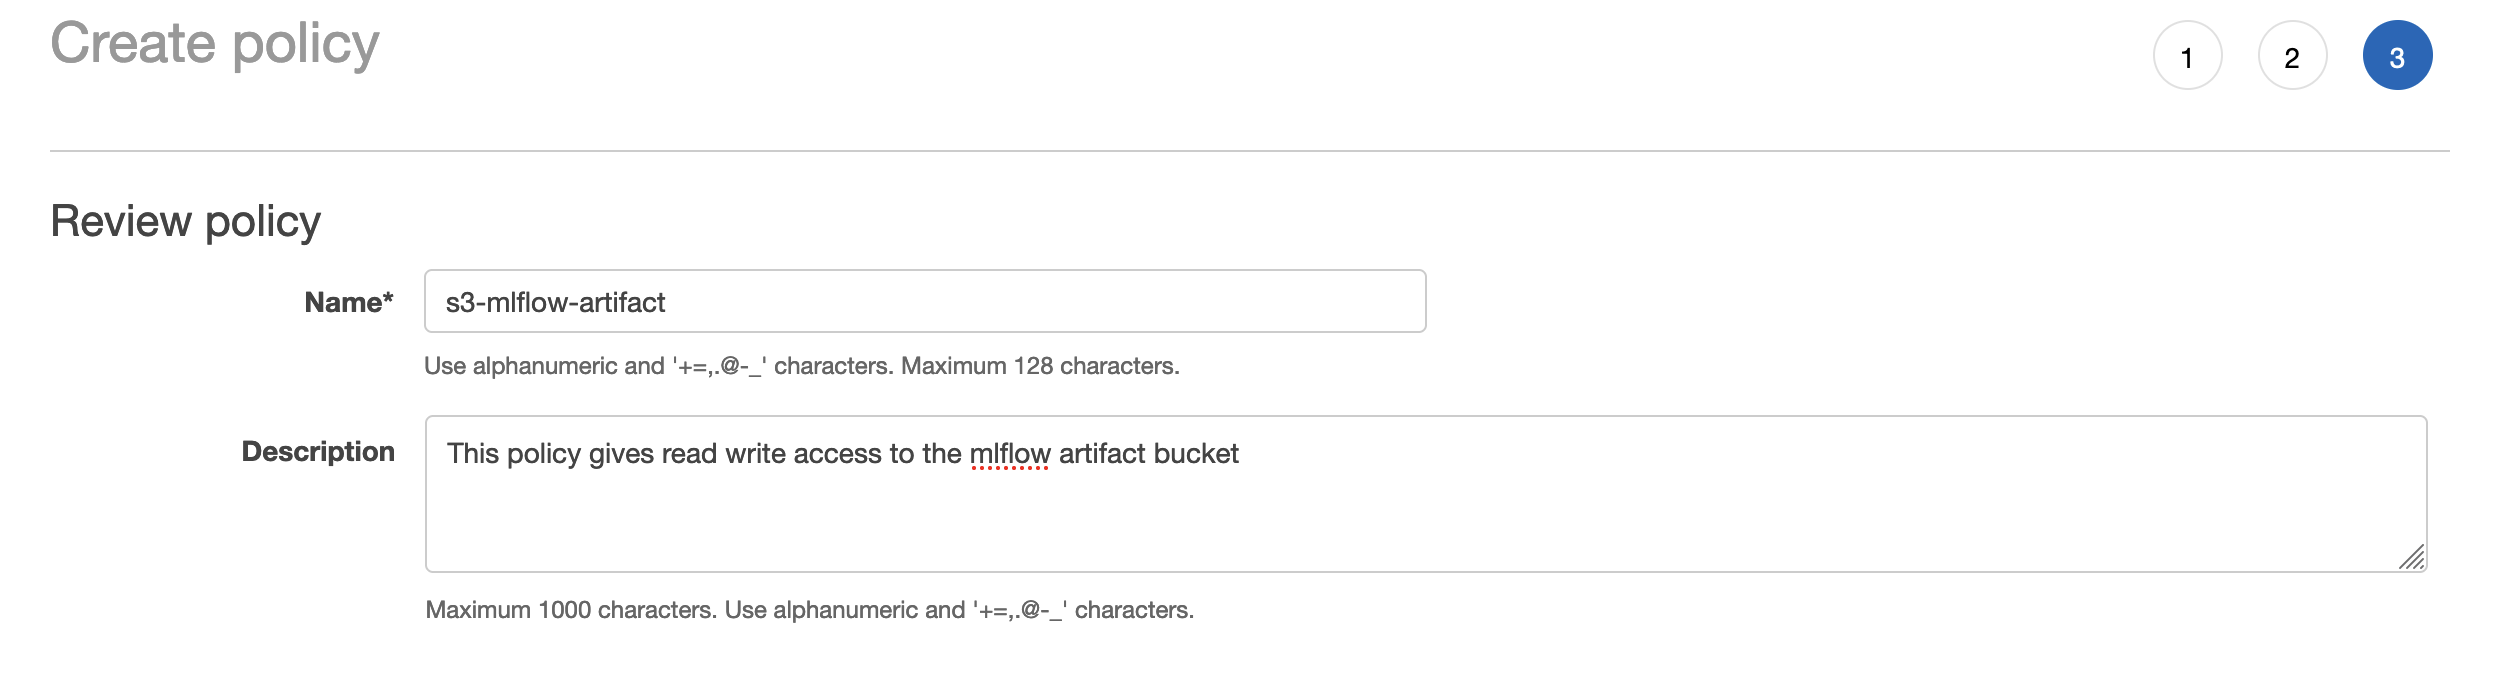
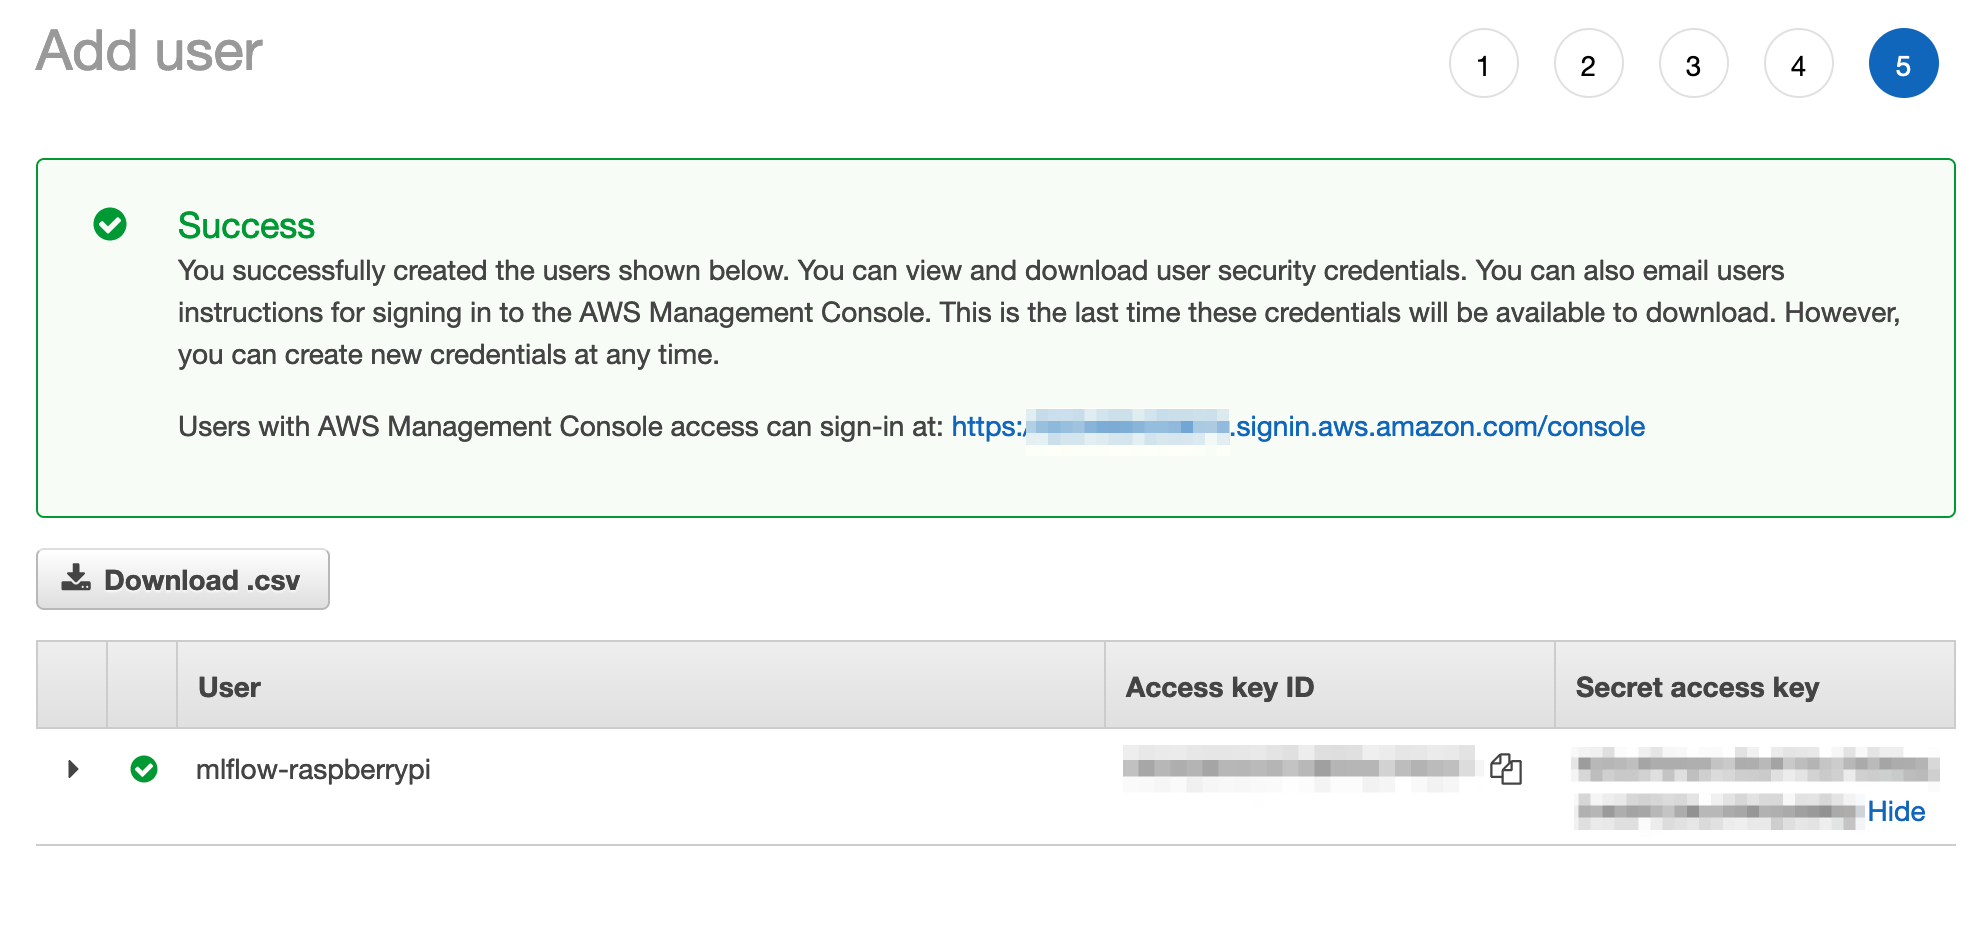
Click on “Create policy” to finish creating the policy. You can now go back to the user creation tab. Click on the refresh button and use the filter to look for your newly created policy. Select it and click the “Next” button until you create your new user. Once the user has been created you’ll be able to copy the access key and the secret access key only this once.
Raspberry Pi aws CLI credentials
Setting up the aws CLI credentials is very simple, you don’t even need to install the cli to complete this step. Logged into your raspberry pi create a directory in your home directory with the name .aws, then navigate to it and create a file named config and another one named credentials.
# config file
[default]
region = us-west-2
Change the region value for the region of your bucket.
# credentials file
[default]
aws_access_key_id = USER_ACCESS_KEY
aws_secret_access_key = USER_SECRET_ACCESS_KEY
Insert the credentials for the created aws user.
Setting up mlflow server
We’ll be using a python virtual environment to isolate our mlflow dependencies and other requirements. But you can always choose to not use a virtual environment.
Logged into your raspberry pi run the following commands
# create a diretory for our instalation
mkdir mlflow
cd mlflow
# create virtual environment and activate it
python3 -m venv venv
source venv/bin/activate
# install dependencies
sudo apt update
sudo apt install awscli
pip install mlflow[extras] psycopg2-binary boto3
pip install --upgrade awscli
Now we can run the mlflow server. For this example we’ll be writing the postgres credentials in plain text, but this is something that could be setup as environment variables. Run only one of these commands:
# local storage for artifacts
nohup mlflow server \
  --backend-store-uri postgresql://mlflow:password@localhost:5432/mlflow \
  --host 127.0.0.1 --port 5000 &

# s3 artifact starage
nohup mlflow server \
  --backend-store-uri postgresql://mlflow:password@localhost:5432/mlflow \
  --default-artifact-root s3://some-bucket-name \
  --host 127.0.0.1 --port 5000 &

# s3 artifact starage with customs root
nohup mlflow server \
  --backend-store-uri postgresql://mlflow:password@localhost:5432/mlflow \
  --default-artifact-root s3://some-bucket-name/custom-artifact-root \
  --host 127.0.0.1 --port 5000 &
Let’s break the command down:
nohupruns our command in the backgroug--backend-store-uriis the URI to our docker postgres container--default-artifact-rootin case we’re using s3 as artifact storage, we specify the bucket and folder that we want mlflow to use as the root path for all artifacts--hostand--portspecify that we’re using localhost and the 5000 port, it’s a good practice to specify it
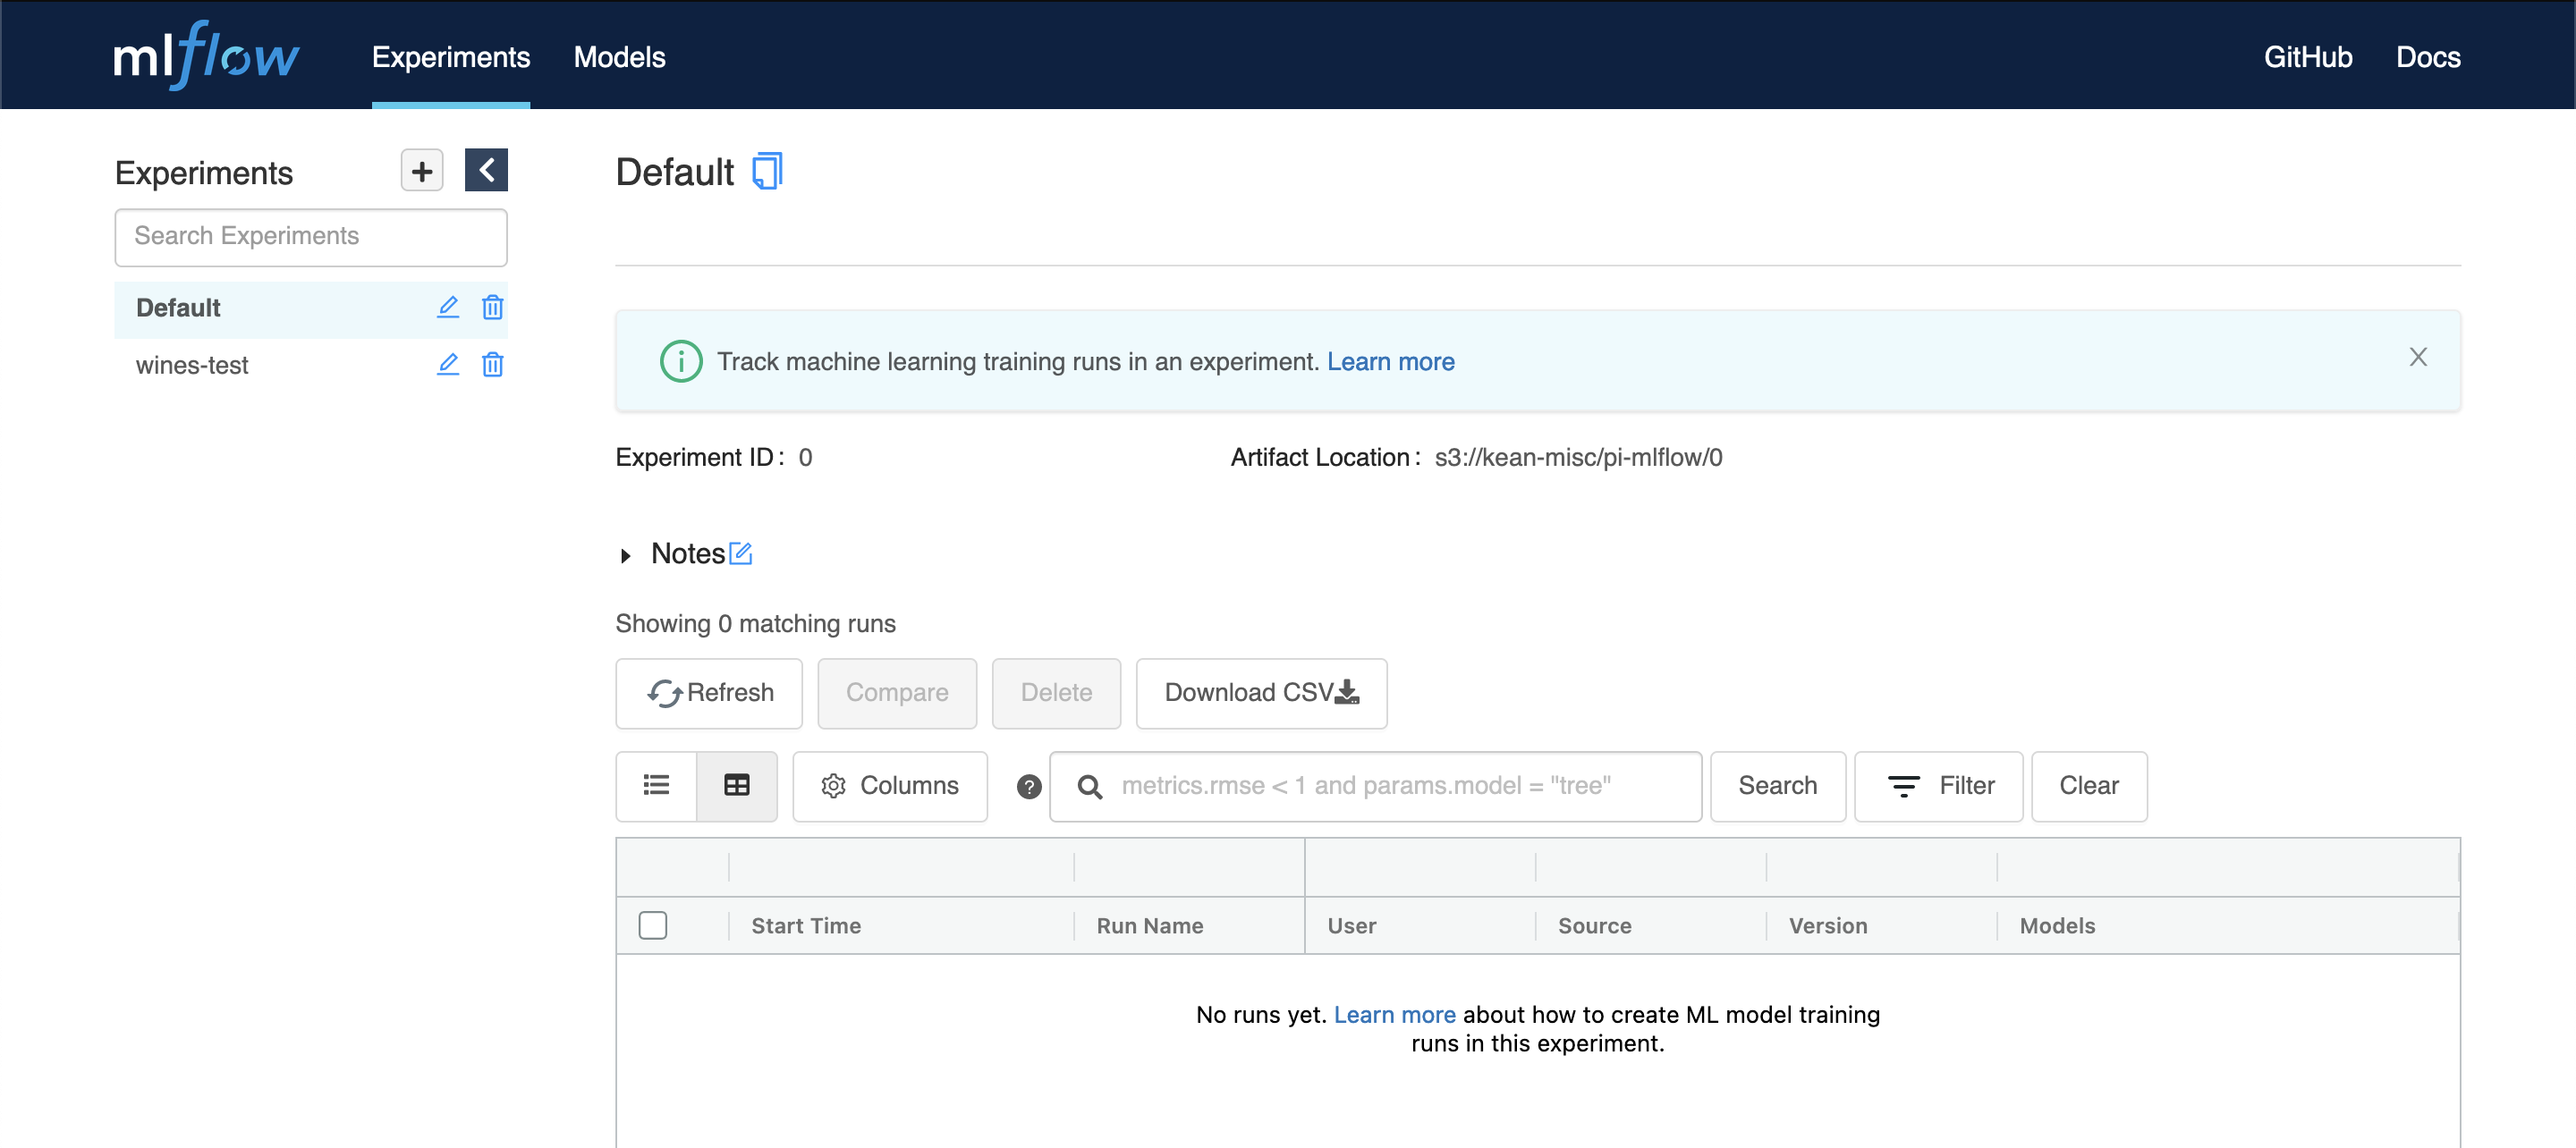
If you use your browser to navigate to your raspberry pi’s IP and port (e.g. http://192.168.100.15:5000), you should see the mlflow UI (assuming that you have have the port open in your Pi). If your Pi isn’t onfigured to allow connections on the specified port. Allowing trafic on ports is out of the scope of this post, but there are great resources out there on how to open ports for connections.
Setting up nginx
Finally we’ll setup nginx as a reverse proxy to handle traffic to our mlflow server using http basic authentication. Note that we’re assuming you haven’t setup a different web server like apache, tomcat or lighttpd. To install nginx run the following commands:
sudo apt update
sudo apt install nginx
sudo apt install apache2-utils
# verify nginx is running
sudo systemctl restart nginx

# create an user for http auth
sudo htpasswd -c /etc/nginx/.htpasswd someuser

# configure nginx
sudo unlink /etc/nginx/sites-enabled/default
cd /etc/nginx/sites-available
sudo nano mlflow.conf
For the confifuration paste the following:
server {
  listen 80;
  listen [::]:80;
  # change server_name to your raspberry pi's IP
  server_name 192.168.x.x;
  # if you have a local DNS setup you can use a custom domain
  # server_name my_local_dns_domain.com;

  access_log /var/log/nginx/mlflow-access.log;
  error_log /var/log/nginx/mlflow-error.log;

  location / {
    proxy_pass http://127.0.0.1:5000;
    auth_basic "Restricted Content";
    auth_basic_user_file /etc/nginx/.htpasswd;
  }
}
Final commands to check the configuration was done correctly and reload nginx:
sudo ln -s /etc/nginx/sites-available/mlflow.conf /etc/nginx/sites-enabled/mlflow.conf
# test configuration
sudo nginx -t
# restart nginx
sudo systemctl restart nginx
Starting mlflow on raspberry pi reboot
Our final step is to make sure that our mlflow server is up even after we reboot our Pi. We can do that with a simple shell script and crontab.
# navigate to our mlflow directory
cd ~/mlflow
nano start-mlflow.sh
Paste the the following contents in the script:
#!/bin/bash

HERE=$( cd "$(dirname "${BASH_SOURCE[0]}")" ; pwd -P )

cd $HERE
source venv/bin/activate
# use the version of the mlflow command that you chose
nohup mlflow server \
  --backend-store-uri postgresql://mlflow:password@localhost:5432/mlflow \
  --default-artifact-root s3://some-bucket-name/custom-artifact-root \
  --host 127.0.0.1 --port 5000 &
Use Ctrl + O to save and Ctrl + X to exit.
chmod +x start-mlflow.sh
crontab -e
Paste the following line at the end of the file:
# mlflow tracking server
@reboot ~/mlflow/start-mlflow.sh
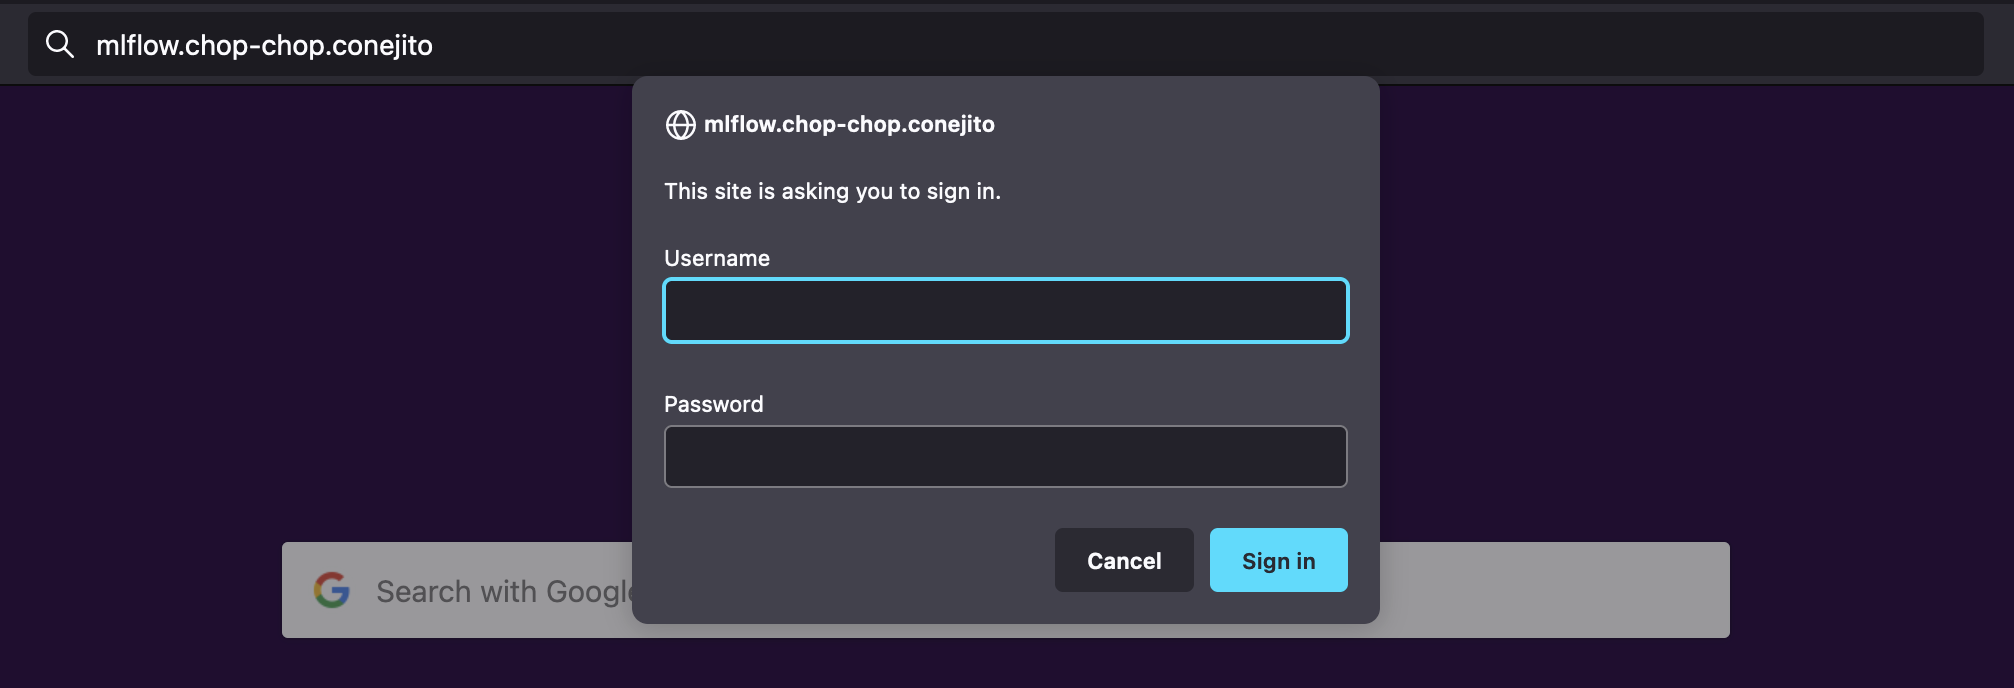
And all done! 🎉 Your mlflow tracking server is now live. You can go to your raspberry pi’s IP (or domain if you setup a local DNS domain like I did) and you should see your tracking server. It’ll ask you for the username you defined in the nginx configuration part.